How To Bleach A Black Shirt
If you have a few plain-black clothes in your wardrobe that are taking up space and aren’t being worn anymore, then why don’t you consider giving them a new lease of life by dyeing them with bleach?
Bleaching and tie-dying my old shirts is something I’ve done for years. It’s my favorite way to transform a boring old t-shirt into something new. There’s no doubt that for the inexperienced, bleaching a black t-shirt can be difficult, but thanks to my years of experience in reinventing some of my old clothes.
I’ll provide you with all of the details on how to transform your old black t-shirts successfully!
So, if you want to know my secret to successfully bleaching a t-shirt, as well as the tips & tricks needed to get the best results.
And some things you need to consider before you begin bleaching your t-shirt, then keep reading, as I’ll tell you everything you need to know!
What You’ll Need
Before you begin to go about bleaching your black t-shirt, you’ll need to gather these supplies!
Don’t worry though, as they’re all relatively inexpensive, so you shouldn’t have any difficulty finding them, and chances are you might already have everything you need to complete this fun DIY project! If you want to spice it up check out our guide to the best rhinestone applicator for some sparkle!!
- A new or old black t-shirt
- Normal household bleach
- Plastic bucket
- Rubber bands
- Rubber gloves
- Spray bottle – this is optional!
- Washing detergent
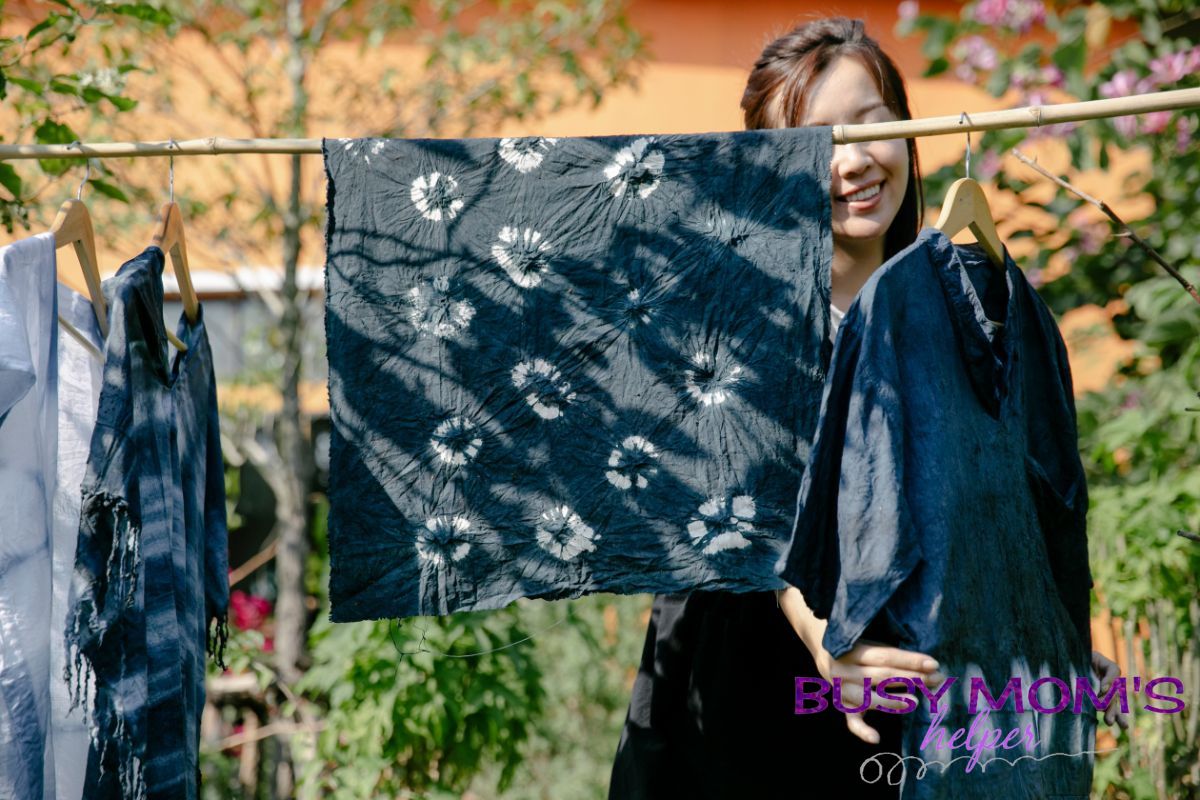
How To Bleach Tie-Dye A T-Shirt
So, now that you have all of the necessary supplies to bleach your t-shirt, it’s time for us to teach you exactly how to bleach your t-shirt!
Remember when it comes to actually bleaching your black t-shirt, you should probably wear clothes that you don’t mind getting bleach on, just in case you make a mistake, or accidentally spill some bleach on yourself.
Step 1
Before you start adding bleach to your t-shirt, you should ensure that whatever t-shirt you plan on using is clean.
So I always believe it’s a good idea to wash your t-shirt on the recommended settings, and allow it to dry completely before I begin to DIY. Also we get a lot of questions on if you can wash multiple tie dye t-shirts together, we have the article for your reference. !
Step 2
Now that you have your completely clean black t-shirt, you’ll need to create the bleach solution in order for the bleach to remain permanently on your t-shirt, but without damaging it.
Typically, I use around ⅓ bleach and ⅔ cold tap water, so create this solution in your plastic bucket.
Remember that bleach is not something you want to come into contact with, so use rubber gloves, and make sure not to splash the water around in case it lands in your eyes or your skin!
Step 3
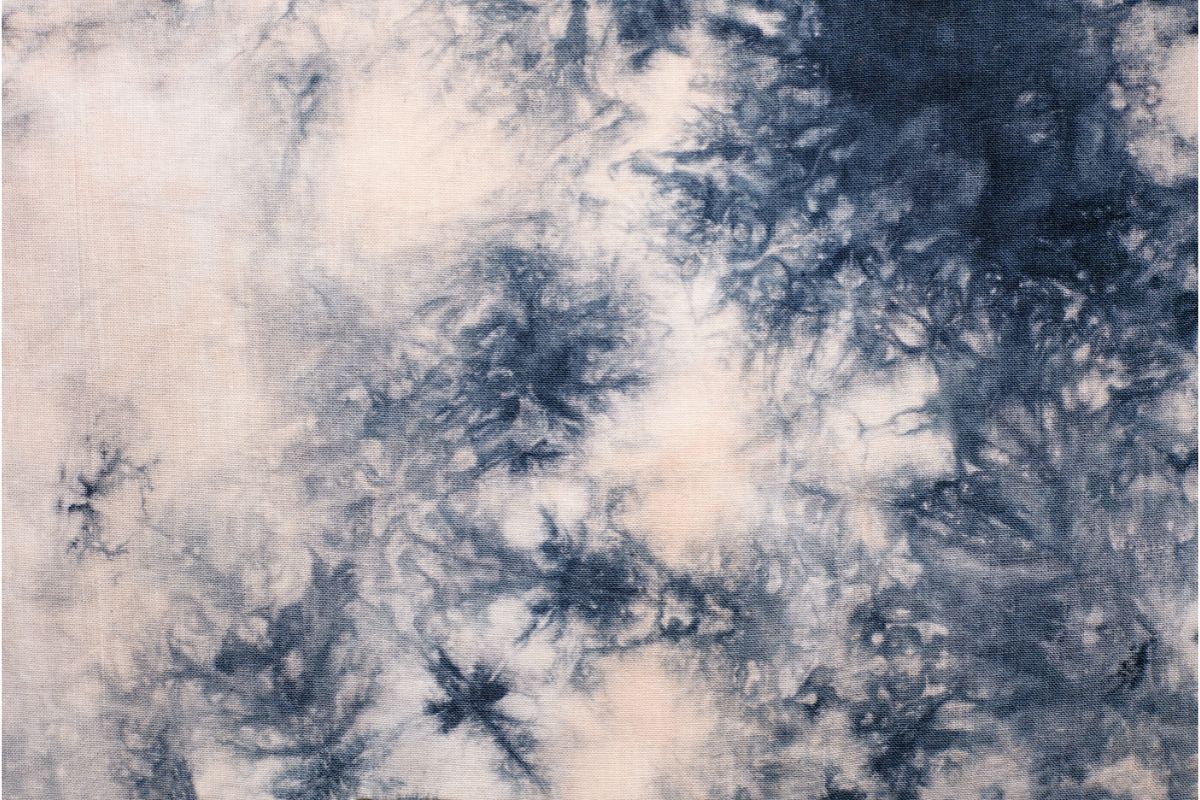
It’s now time for you to choose what sort of pattern you’re going to create on your t-shirt.
And whilst I won’t go into any particular methods here, there are a load of different ways that you can go about bleaching your t-shirt, If you would like to bleach shirts for sublimation the right way, check out our how to guide. .
I often choose to create a spiralled effect, and the best way to do this I found is to use a small rod to twirl your t-shirt around into a bundle.
Where you can then use rubber bands to help keep it in shape, or I simply scrunch up my t-shirt into different irregular shapes to form interesting bleach patterns.
Whatever way you decide to bleach your t-shirt, just remember to tie it together using rubber bands, otherwise, it will lose its shape inside the bucket, and the bleach won’t set in as you want it to.
Step 4
Once you’ve decided upon the pattern you want, you want to lower your t-shirt gently into the bleach solution you created in the plastic bucket.
I’ve found that you’ll need to completely submerge your t-shirt for the best results, although how well the t-shirt takes the bleach is dependent on the manufacturer and the material, I’ve noticed that 100% cotton always works best.
Step 5
Once you’ve let your t-shirt sit in the water for around 10-15 minutes, remove it, and remove the rubber bands that were used to keep it in shape.
Then you want to quickly place your t-shirt into the washing machine, and wash your t-shirt on the recommended settings as you usually would.
Just make sure to use plenty of detergent to help wash out any excess bleach, which will prevent your t-shirt from irritating your skin.
Once your t-shirt has finished washing, you’ll need to hang it out to dry, and then you can wear your newly transformed t-shirt!
Frequently Asked Questions
Bleaching is a form of tie-dyeing that works with darker-coloured clothes, such as black or navy coloured t-shirts.
And is incredibly popular at the moment as people look for new ways to transform their new clothes, as opposed to continually buying new clothes. But how exactly does it work?
Bleaching is a great alternative to tie-dyeing, especially if you only have darker coloured t-shirts, as the bleach will take to the t-shirts much better than coloured dye will.
And you don’t even have to buy specific dyes as you do for tie-dying, as you can simply use the same household bleach that you will find around your house, which makes it much less expensive.
It is possible for bleach to turn a black t-shirt to a much lighter color, however, it might not remove enough of the color for the t-shirt to become completely white.
Final Thoughts
So there you have it, the best way to bleach a black t-shirt. It really is an excellent way to breathe new life into an old, boring, piece of clothing. Another fun fact about t-shirts, you can even create a teddy bear made from baby clothes pattern by yourself!
And it’s a great way of trying to give your old clothing another chance, instead of throwing it away and buying more instead, which is much better for the environment!
We hope you enjoyed this tutorial, and that you get to bleaching your own black t-shirts soon, thanks for reading!