Busy Moms Helper

Family fun, food, recipes, crafts, and free printables

  • Home
  • Busy Mom’s Shop
    • Monthly Printable Subscription Plan
  • Recipes
    • Desserts
    • Snacks
    • Appetizer
    • Side Dish
    • Main Dish
    • Holiday Food
    • Breakfast
    • Slow Cooker
    • Tried and True
  • Crafts & DIY
    • Gifts
    • Holidays
    • For the Home
    • Kid Friendly
    • Parties
    • Printables
  • Home & Life
    • Parenting
    • Time Management
    • Organization & Cleaning
    • Finance
    • Faith
    • Relationships
    • Blogging
    • Health & Fitness
    • Eating Out
    • Pets
    • Style
  • Printables
  • Travel
    • Theme Parks
    • Travel Tips & Tricks
  • Nerd Stuff
    • Star Wars
    • Superhero
    • Legos
    • Harry Potter
    • Disney
    • Tech

Strawberry Almond Overnight Oats

June 25, 2018 by Chellie Schmitz

Summer is in full swing! This means for most, kids are out of school and schedules change into a different mode.  Mornings can be a little chaotic in the kitchen with all four of my kids trying to get their breakfast. Of course, they’re ravenous (always) because they haven’t eaten in 12 hours, so ya know, it’s all about them getting food.  That’s why I love these Strawberry Almond Overnight Oats!

strawberry almond overnight oats

Strawberry Almond Overnight Oats

It’s the perfect grab ‘n go breakfast, even if you’re eating at home!  The oats are prepped the night before, so all they have to do is grab a jar and a spoon and enjoy!  Everyone in our family loves these.  If you are headed off to work in the morning, it’s perfect to take with you as your breakfast or even a fabulous nutritional mid-morning snack that will keep you energized.

strawberry almond overnight oats

I live in a 4 season climate.  Summer, specifically June is peak time for strawberries.  There is just nothing like farm fresh, straight from the bush, strawberries (and blueberries, cherries, etc).  That is why I chose Strawberry Almond Overnight Oats, but, these are so versatile that the flavor combinations are endless!

The basic recipe is simple:

strawberry almond overnight oats

1/4 cup old fashioned rolled oats

strawberry almond overnight oats

1/4 cup plain non fat yogurt

1 teaspoon Truvia

strawberry almond overnight oats

1 1/2 teaspoons chia seeds

strawberry almond overnight oats

1/4 cup almond milk

 After this, you add your fruit and flavorings. For this recipe, I added a 1/4 tsp almond extract and sliced strawberries.

strawberry almond overnight oats

Cover it again, shake it up and let it set in the fridge to do it’s magic!  I typically add a little more fresh fruit to top it off in the morning, but totally not necessary if you don’t want the hassle.

strawberry almond overnight oats

So this recipe, really doesn’t take much time at all to make. I’ve given you the measurements for 1 pint sized jar.  I just line up the how many jars I need and add the ingredients to each.  The kids love making these too.  Sometimes in the afternoon, we’ll make them together, for the next day.

Notes~

  • Truvia is my sweetener of choice to make it friendly for the whole family.  Some of us can’t have sugar.  You can also use honey, or use vanilla yogurt instead of plain and skip the sweetener all together.
  • Regular milk works just as good as any nut milk, so don’t let that ingredient keep you from trying it.
  • Always shake it before adding your fruit, it will blend together much easier.  Give it another shake after adding the fruit, or just stir.


Print Recipe

Strawberry Almond Overnight Oats

Ingredients

  • 1/4 cup old fashioned rolled oats
  • 1/4 cup plain non-fat Greek yogurt
  • 1 tsp Truvia or honey or other sweetener
  • 1 1/2 tsp chial seeds
  • 1/4 cup almond milk or regular milk
  • 1/4 tsp almond extract
  • 2-3 Tbs fresh sliced strawberries you need enough to fill the jar

Instructions

  • Place the oats, yogurt, sweetener, chia seeds, almond extract, and milk in a pint size mason jar.
  • Cover and shake vigorously until ingredients are well combined.
  • Add fruit, cover and shake again to mix it in.
  • Place in the refrigerator overnight. In the morning, the mixture will be thick.
  • Enjoy!

Want more flavor ideas?

refrigeratoroatmeal-2-200x300Blueberry Maple

Apple_peanutbutter_overnight_oats-5Apple Peanut Butter

Filed Under: Breakfast Tagged With: Strawberry Almond overnight oats

All American Hot Dogs

June 25, 2018 by Chellie Schmitz

all american hot dogs

It is back yard barbecue season!  Hosting an outdoor gathering is always so much fun.  Why not beef up your bbq with these All American Hot Dogs? Take it up a notch, add some fun!

all american hot dogs

All American Hot Dogs

So, let’s talk about hot dogs for a moment shall we?  Do you love’em or hate’em? I remember being a kid and thinking they were the best things ever!  Well, my tastes have changed, slightly, to say the least.

all american hot dogs

Since I’m a much healthier eater now than when I was a kid, I have a hard time buying hot dogs. Simply because they are processed and often loaded with things that aren’t the best for you.  I’m continuously trying to make the best possible version of whatever I’m making.  So, while I don’t think there is such a thing as a “healthy” hot dog, there are better for you options.

all american hot dogs

I love to keep entertaining simple but delightful.  So these All American Hot Dogs really do bring the norm to another level with added barbecue pork and creamy cole slaw. But, it doesn’t take too much more effort. And, I’m using all beef, no nitrates, blah blah blah… they’re better for you!  🙂 I’ll also use an all natural barbecue sauce, and broccoli slaw instead of cabbage.

all american hot dogs

What you need~

  • all natural, beef hot dogs (or regular hot dogs do just fine)
  • season all
  • Pork shoulder
  • all natural barbecue sauce
  • broccoli slaw
  • mayonnaise
  • dijon mustard
  • apple cider vinegar
  • honey
  • salt
  • poppy seeds
  • hot dog buns

What to do~

  1. Season the pork shoulder generously with season all or some other all purpose seasoning. Cook the pork shoulder, low and slow until you can shred it with a fork.
  2. Shred the pork with a fork and place into another pan or container.  Add barbecue sauce and stir well.
  3. Make the slaw~ combine mayonnaise, mustard, vinegar, honey, and salt and stir well. Add a 12 oz package of broccoli slaw and toss to combine.  Top with poppy seeds.
  4. Put it all together!  After grilling your dogs, top them with bbq pork and slaw and enjoy!

all american hot dogs

Notes~

  • I used the slow cooker to cook the pork shoulder.  It needed a good 10 hours on low.  For sure prep this beforehand.  If you’d prefer to use your oven, see this shredded pork recipe.
  • You can use regular cole slaw if you prefer, or chop up your own green cabbage, red cabbage, and carrots.  I chose broccoli slaw to add some more nutrition.

I hope you enjoy these as much as we did.  It was a nice way to change up the regular routine without too much more effort.


all american hot dogs
Print Recipe

All American Hot Dogs

Ingredients

  • 1 package of all nautral all beef hot dogs no nitrates added.
  • 1 pork shoulder
  • seasoned salt
  • 1 bottle of all natural bbq sauce or homemade
  • 1 12 oz package broccoli slaw
  • 3/4 cup mayonnaise
  • 2 Tbs dijon mustard
  • 2 Tbs apple cider vinegar
  • 2 Tbs honey
  • 1/2 tsp salt
  • poppy seeds for garnishing
  • 8 hot dog buns

Instructions

  • Prepare the pork, by seasoning generously with seasoned salt.
  • Cook in the slow cooker for 8-10 hours on low, or until you can easily shred with a fork.
  • Shred all the pork, place it in a pan on low heat to maintain warmth.
  • Add barbecue sauce (about 2 1/2 cups, or to taste) and stir to combine.
  • For the slaw:
  • Combine mayonnaise, mustard, vinegar, honey and salt together and stir well.
  • Add the broccoli slaw to the dressing and toss to coat.
  • Garnish with poppy seeds.
  • Grill hot dogs until hot throughout and plump.
  • Top each hotdog with bbq pork and creamy cole slaw, garnish with more poppy seeds if desired.

Looking for more back yard bbq ideas?

BLT Salad on a stick
BLT_salas_on_a_stick-4

All natural Go-gurts
homemade_gogurt-1

Filed Under: Main Dish Tagged With: all american hot dogs, BBQ, Grilling, Summer

Easiest Iced Coffee

June 25, 2018 by Chellie Schmitz

easiest iced coffee

As the weather turns warmer, many people change out a hot cup of joe for a frosty version.  Is this you?  Today I’m sharing the Easiest Iced Coffee recipe.  Make up a batch of this and enjoy it all week long!


easiest iced coffee

Easiest Iced Coffee

Whether you drink your coffee in the morning, or need an afternoon pick me up, you won’t be disappointed in this delicious beverage.

This is for all my fellow coffee addicts lovers.  I’m still all about enjoying that fancy coffee from your local coffee house, but realistically, I can’t quite get out twice a day for that! Besides, that can add up pretty quickly! So, that’s why I decided to start brewing it at home.

easiest iced coffee

I really do have a passion for taking recipes that are from restaurants and making a just as delicious and better for you option at home.  While I don’t think coffee is bad for you–as a matter of fact the experts say there are lots of benefits–I still like to try my hand at making the perfect cup of joe. So what are we waiting for? Let’s get going on this easiest iced coffee so we can have a chat over it.  😉

What you need~

  • coffee beans
  • water
  • ice
  • cream & sugar (optional)

What to do~

  1. Brew the coffee
  2. Chill
  3. Drink!

See isn’t that easy?  MMM I can just smell that coffee brewing!

easiest iced coffee

Notes~

  • If you don’t have a coffee grinder, you can just use coffee grounds.  We are kind of coffee snobs at our house, so we like to grind our own beans.
  • If you like your coffee sweetened, add the sugar before you chill it so it melts.
  • To flavor the coffee add some vanilla extract or ground cinnamon to the grounds before brewing.
  • Make adjustments to how strong you like your coffee.  I suggest brewing double strength so the ice doesn’t water it down, but if that’s too strong for you, maybe brew 1 1/2 strength.
  • All coffee pots are different sizes so there is not a specific measurement for how many coffee beans to use, and preferences are different, but you should be able to easily figure it out.

easiest iced coffee

I can totally see myself poolside, soaking up the sun, book in hand, sipping on my fabulous iced coffee.  Can you picture it? 🙂  Who’s with me?

Enjoy! I’ll see you at the pool!  🙂


easiest iced coffee
Print Recipe

Easiest Iced Coffee

Ingredients

  • coffee beans ground (for 2 pots of coffee)
  • water
  • ice
  • cream and sugar optional

Instructions

  • Brew coffee at double strength. The ice dilutes it, so this way it won't taste watered down.
  • Let the coffee cool to room temperature.
  • Place the coffee in a carafe or pitcher and place in the fridge to chill.
  • Fill glasses all the way with ice.
  • Pour coffee and add cream & sugar if desired. Enjoy!

Looking for more frosty beverages?

easiest iced coffeeStrawberry Lemonade


easiest iced coffeeBlueberry Lemonade


easiest iced coffeeStrawberry Mojito Mocktail

Filed Under: Drinks

Taco Popcorn {all natural}

December 28, 2020 by Chellie Schmitz

taco popcorn

Need an after school snack?  Having a movie night? Want to add some pizazz to your snack time? I’ve got your back friend!  Try this taco popcorn!  This is a family favorite.  Everyone loves tacos right? And, everyone loves popcorn.  So why not combine the two?  Give it a try, you’ll love it!

taco popcorn

This post may contain affiliate links that support blogs at no extra cost to you. See our Disclosure.

Taco Popcorn

Besides just tasting great, taco popcorn is super easy to make.  It takes hardly any ingredients, and it’s just a winner, trust me.  If you’re used to microwave popcorn, I’m just going to challenge you today friend, make this on the stove top. It takes about the same amount of time, and it tastes so good!

At our house, we are Whirley Pop lovers.  But, you don’t need a Whirley Pop to make this.  A big heavy bottom pan is just fine.  Also, I’m going to share with you a homemade taco seasoning to make this.  You probably have these ingredients in your house already.  But, just know, if you want to use store bought taco seasoning, go right ahead.

taco popcorn

What you need~

  • popcorn kernels
  • coconut oil
  • chili powder
  • cumin
  • garlic powder
  • smoked paprika
  • oregano
  • onion powder
  • salt
  • pepper

taco popcorn

What to do~

  • Combine spices and stir well.
  • Place oil, popcorn kernels and salt in a covered pan over medium heat,
  • Gently shake the pan every so often.  After a few minutes, it will begin to pop
  • Continue to shake periodically.  When there are 2-3 seconds in between pops, take it off the heat.
  • Empty half the popcorn into a bowl and sprinkle with the taco seasoning, empty the rest and sprinkle on more, gently toss.

taco popcorn

Notes~

  • If you’re using a Whirley Pop, you don’t need to shake the pan, and I’m sure you already know this.  Just put the first few ingredients in, and start turning.
  • I love to use coconut oil, but canola or vegetable oil is good too.
  • The oil should cover the bottom of the pan and almost cover the kernels.  If you are used to using the Whirley Pop, then I’m sure you already know how much oil to use. Mine is at the point where it only takes a teaspoon.
  • You will have more than enough taco seasoning.  It really depends on how much seasoning you like. I used about 2-3 teaspoons total.
  • If you like heat, add some cayenne pepper to the spice mixture.  I’ve got little ones, so we don’t do too spicy.
  • If you like butter drizzled on your popcorn, then by all means, add it!
  • You can use regular paprika if you don’t have smoked paprika, but the smoked adds a nice smokey flavor.
  • A little thing we discovered for the salt we include with the popcorn– if you have a coffee grinder or spice grinder, run some of it through there.  It will make it like a fine powder, and we discovered it distributes really well that way.  Totally not necessary, but a great tip if you want to try it!

Enjoy your taco popcorn!!  Do you have a favorite way to make popcorn?  I’d love to hear from you!

taco popcorn

taco popcorn
Print Recipe

Taco Popcorn

Ingredients

  • 1 tsp chili powder
  • 1/2 tsp cumin
  • 1/2 tsp garlic powder
  • 1/2 tsp smoked paprika
  • 1/4 tsp oregano
  • 1/4 tsp onion powder
  • 1/2 plus 1/8 tsp salt divided
  • 1/8 tsp pepper
  • coconut oil see notes
  • 1/2 cup popcorn kernels

Instructions

  • Combine chili powder, cumin, garlic powder, smoked paprika, oregano, onion powder, 1/8 tsp salt and pepper, stir and set aside.
  • Place oil, 1/2 tsp salt, and popcorn kernels in a Whirley Pop or heavy bottom pan.
  • Over medium heat, periodically shake the pan until all kernels are popped.
  • Pour half of the popcorn in a bowl, sprinkle 1 tsp taco seasoning over top. Pour the other half of the popcorn in the bowl and add another teaspoon of seasoning, gently toss.
  • Add more seasoning if desired.

Looking for more fabulous snacks?  Check these out:

sweet_potato_chips-6Sweet Potato Chips

Black_bean_dip-2Baked Black Bean Dip

Filed Under: Snack Tagged With: popcorn, taco popcorn

Single Serve Cranberry Baked Oatmeal

June 25, 2018 by Chellie Schmitz

single serve cranberry oatmeal

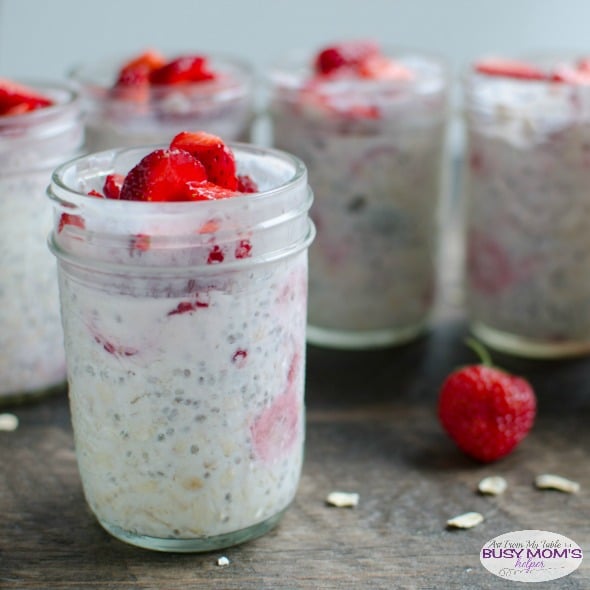
Single Serve Cranberry Baked Oatmeal Cups

These Single Serve Cranberry Baked Oatmeal cups are the perfect on the go breakfast!! Do you feel like your mornings are rushed? Is it a little cray cray at your house?  I know they are at my house! Not all the time, but we have certain mornings that are extra full.

single serve cranberry baked oatmeal

We’ll here’s one tip to a smoother morning… Single Serve Cranberry Baked Oatmeal!  Sounds fancy, right?  You feel like your eating a weekend breakfast during the week! But, they are super easy to put together, they only bake for about 25 minutes.  Whip up a batch or two on the weekend and you’ll have these all week!

single serve cranberry baked oatmeal

Have you had baked oatmeal?  I know some people sort of squirm at the sound of oatmeal.  They think it’s a bit boring, or plain.  I promise you this is not even close to boring!  It actually tastes like a delicious soft cookie!  Shh!  Don’t tell your kids it’s nutritious!  They’ll never know!

The best part?  Single serve!  Grab and go!  I don’t know what it is, but there is just something about individual servings.  My kids think they’re the bomb.

What you need~

  • rolled oats
  • brown sugar
  • cinnamon, baking powder, salt
  • dried cranberries
  • eggs
  • milk
  • butter
  • unsweetened applesauce
  • vanilla

single serve cranberry baked oatmeal

What to do~

  • Combine oats, sugar, cinnamon, baking powder, and salt into a large bowl
  • Add cranberries and stir
  • In a separate bowl add eggs, milk, butter, applesauce and vanilla, mix well
  • Place in muffin tin lined with cupcake liners
  • bake

single serve cranberry baked oatmeal

We like to eat these warm, I would definitely recommend warming them up, even if you’re on the way out the door.  Pop them in the microwave for 40 seconds and you’re off!

If you’re eating in, take the cupcake wrapper off and put the single serve cranberry baked oatmeal cup in a bowl. After you warm it up, give it a splash of milk.  Vanilla yogurt is really good on it too.

single serve cranberry oatmeal


single serve cranberry oatmeal
Print Recipe

Single Serve Cranberry Baked Oatmeal

Prep Time10 mins
Cook Time25 mins
Total Time35 mins
Servings: 12

Ingredients

  • 3 cups rolled oats
  • ½ cup brown sugar
  • 2 tsp cinnamon
  • 2 tsp baking powder
  • 1 tsp salt
  • 2 eggs
  • 1 cup milk
  • ¼ cup melted butter
  • ¼ cup unsweetened applesauce
  • 2 tsp vanilla

Instructions

  • Preheat oven to 350. Combine oats, brown sugar, cinnamon, baking powder and salt in a large bowl.
  • In a separate bowl, combine eggs, milk, butter, applesauce and vanilla
  • Add wet ingredients to the dry ingredients and mix well.
  • Pour into an 8x8 greased baking dish and bake at 350 for 40 minutes until golden brown.

Notes

You can use any dried fruit, frozen fruit or fresh fruit in place of the Craisins.
You can also bake the mixture all together in an 8x8 pan. To do that, increase your baking time by 10-15 minutes

Want more? Check out these not so boring oatmeal recipes!

Almond_Joy_oatmeal-15pinAlmond Joy Oatmeal

Pumpkin_roll_oatmeal-4pinPumpkin Roll Oatmeal

salted_caramel_apple_oatmeal-13pinSalted Caramel Apple Oatmeal

Filed Under: Breakfast Tagged With: cranberry, easy recipe

Chicken Bowls With Homemade Salsa Verde

December 28, 2020 by Chellie Schmitz

chicken bowls with homemade salsa verde

Do you need a 20 minute weeknight meal that knocks your socks off?  Try these Chicken Bowls with Homemade Salsa Verde!  Green Salsa is easier than you think to make.  You could make this recipe with jarred sauce, but homemade is SO much better!  I don’t think you’ll regret it.  Plus, 20 minutes?  It’s no time at all for a grand dinner!

chicken bowls with homemade salsa verde

Chicken Bowls With Homemade Salsa Verde

chicken bowls with homemade salsa verde

These are tomatillos.  Have you ever tried them? This is what salsa verde, or, green salsa is made out of.  They come with these little papery husks on them. Once the husks are peeled off the tomatillos feel sticky.  So, next they need to be rinsed well.  I like to use a vegetable cloth on mine just to help get it off good.

chicken bowls with homemade salsa verde
This post may contain affiliate links

Now that we’ve had a lesson in tomatillos, let’s get rolling on this recipe.

This recipe is adapted from Mark Bittman’s Kitchen Express.  This is one of my favorite cookbooks for quick meals–as the title suggests.  🙂  It’s all real food and very simple to put together.  It’s divided into seasons, and I love that too.

If you want to learn how to make anything in your kitchen, Mark also has a book called “How to Cook Everything“. This is my go-to for so many things.  Homemade condiments, ice cream, really, anything you can think of, it’s in there–kinda like prego–it’s in there!

chicken bowls with homemade salsa verde

Ingredients:

  • 12 tomatillos, peeled and rinsed
  • juice of 1 lime
  • 1 (4 oz) can chopped green chilis
  • 1 clove of garlic, minced or smashed into a paste
  • salt and pepper to taste
  • rotisserie chicken (either store bought, or make your own), shredded
  • 1 cup sour cream
  • milk
  • 1 avocado, diced
  • cilatro for serving
  • Corn chips for serving

chicken bowls with homemade salsa verde

Instructions:

  1. Quarter the tomatillos and put them in a food processor.  Add lime juice, garlic and chiles. Pulse the processor until you have the desired consistency.  I like mine a little bit chunky, but not too much. Pour the sauce into a sauce pan and bring it to a soft boil.
  2. Add the shredded chicken and let it simmer.  Add salt and pepper to taste.
  3. Put the sour cream in a bowl, and add just enough milk until it’s a smooth sauce that’s pourable.
  4. Load up bowls with the chicken mixture.  Top with avocado, cilantro, sour cream sauce and corn chips.

See? Easy as pie, or I should say easier, way easier than pie.  Enjoy your chicken bowls with homemade salsa verde that only took you 20 minutes to make!!  🙂

chicken bowls with homemade salsa verde

chicken bowls with homemade salsa verde
Print Recipe

Chicken Bowls With Homemade Salsa Verde

Ingredients

  • 12 to matillos peeled and rinsed
  • juice of 1 lime
  • 1 4 oz can chopped green chilis
  • 1 clove of garlic minced or smashed into a paste
  • salt and pepper to taste
  • rotisserie chicken either store bought, or make your own, shredded
  • 1 cup sour cream
  • milk
  • 1 avocado diced
  • cilatro for serving
  • Corn chips for serving

Instructions

  • Quarter the tomatillos and put them in a food processor. Add lime juice, garlic and chiles. Pulse the processor until you have the desired consistency. I like mine a little bit chunky, but not too much. Pour the sauce into a sauce pan and bring it to a soft boil.
  • Add the shredded chicken and let it simmer. Add salt and pepper to taste.
  • Put the sour cream in a bowl, and add just enough milk until it's a smooth sauce that's pourable.
  • Load up bowls with the chicken mixture. Top with avocado, cilantro, sour cream sauce and corn chips.

Looking for more fast and fabulous meals?

Citrus_Lime_Chicken_Souptw-3Citrus Chicken Soup

Turkey_sweet_potato_skilletpin-3Turkey Sweet Potato Skillet Dinner

Come visit me on my Facebook page for even more awesome recipes!

Filed Under: Main Dish Tagged With: 20 minute meal, Chicken, easy, Homemade, Mexican, salsa verde

Sugar Free Fruit Salsa with Cinnamon Chips

June 25, 2018 by Chellie Schmitz

sugar free fruit salsa with cinnamon chips

sugar free fruit salsa with cinnamon chips

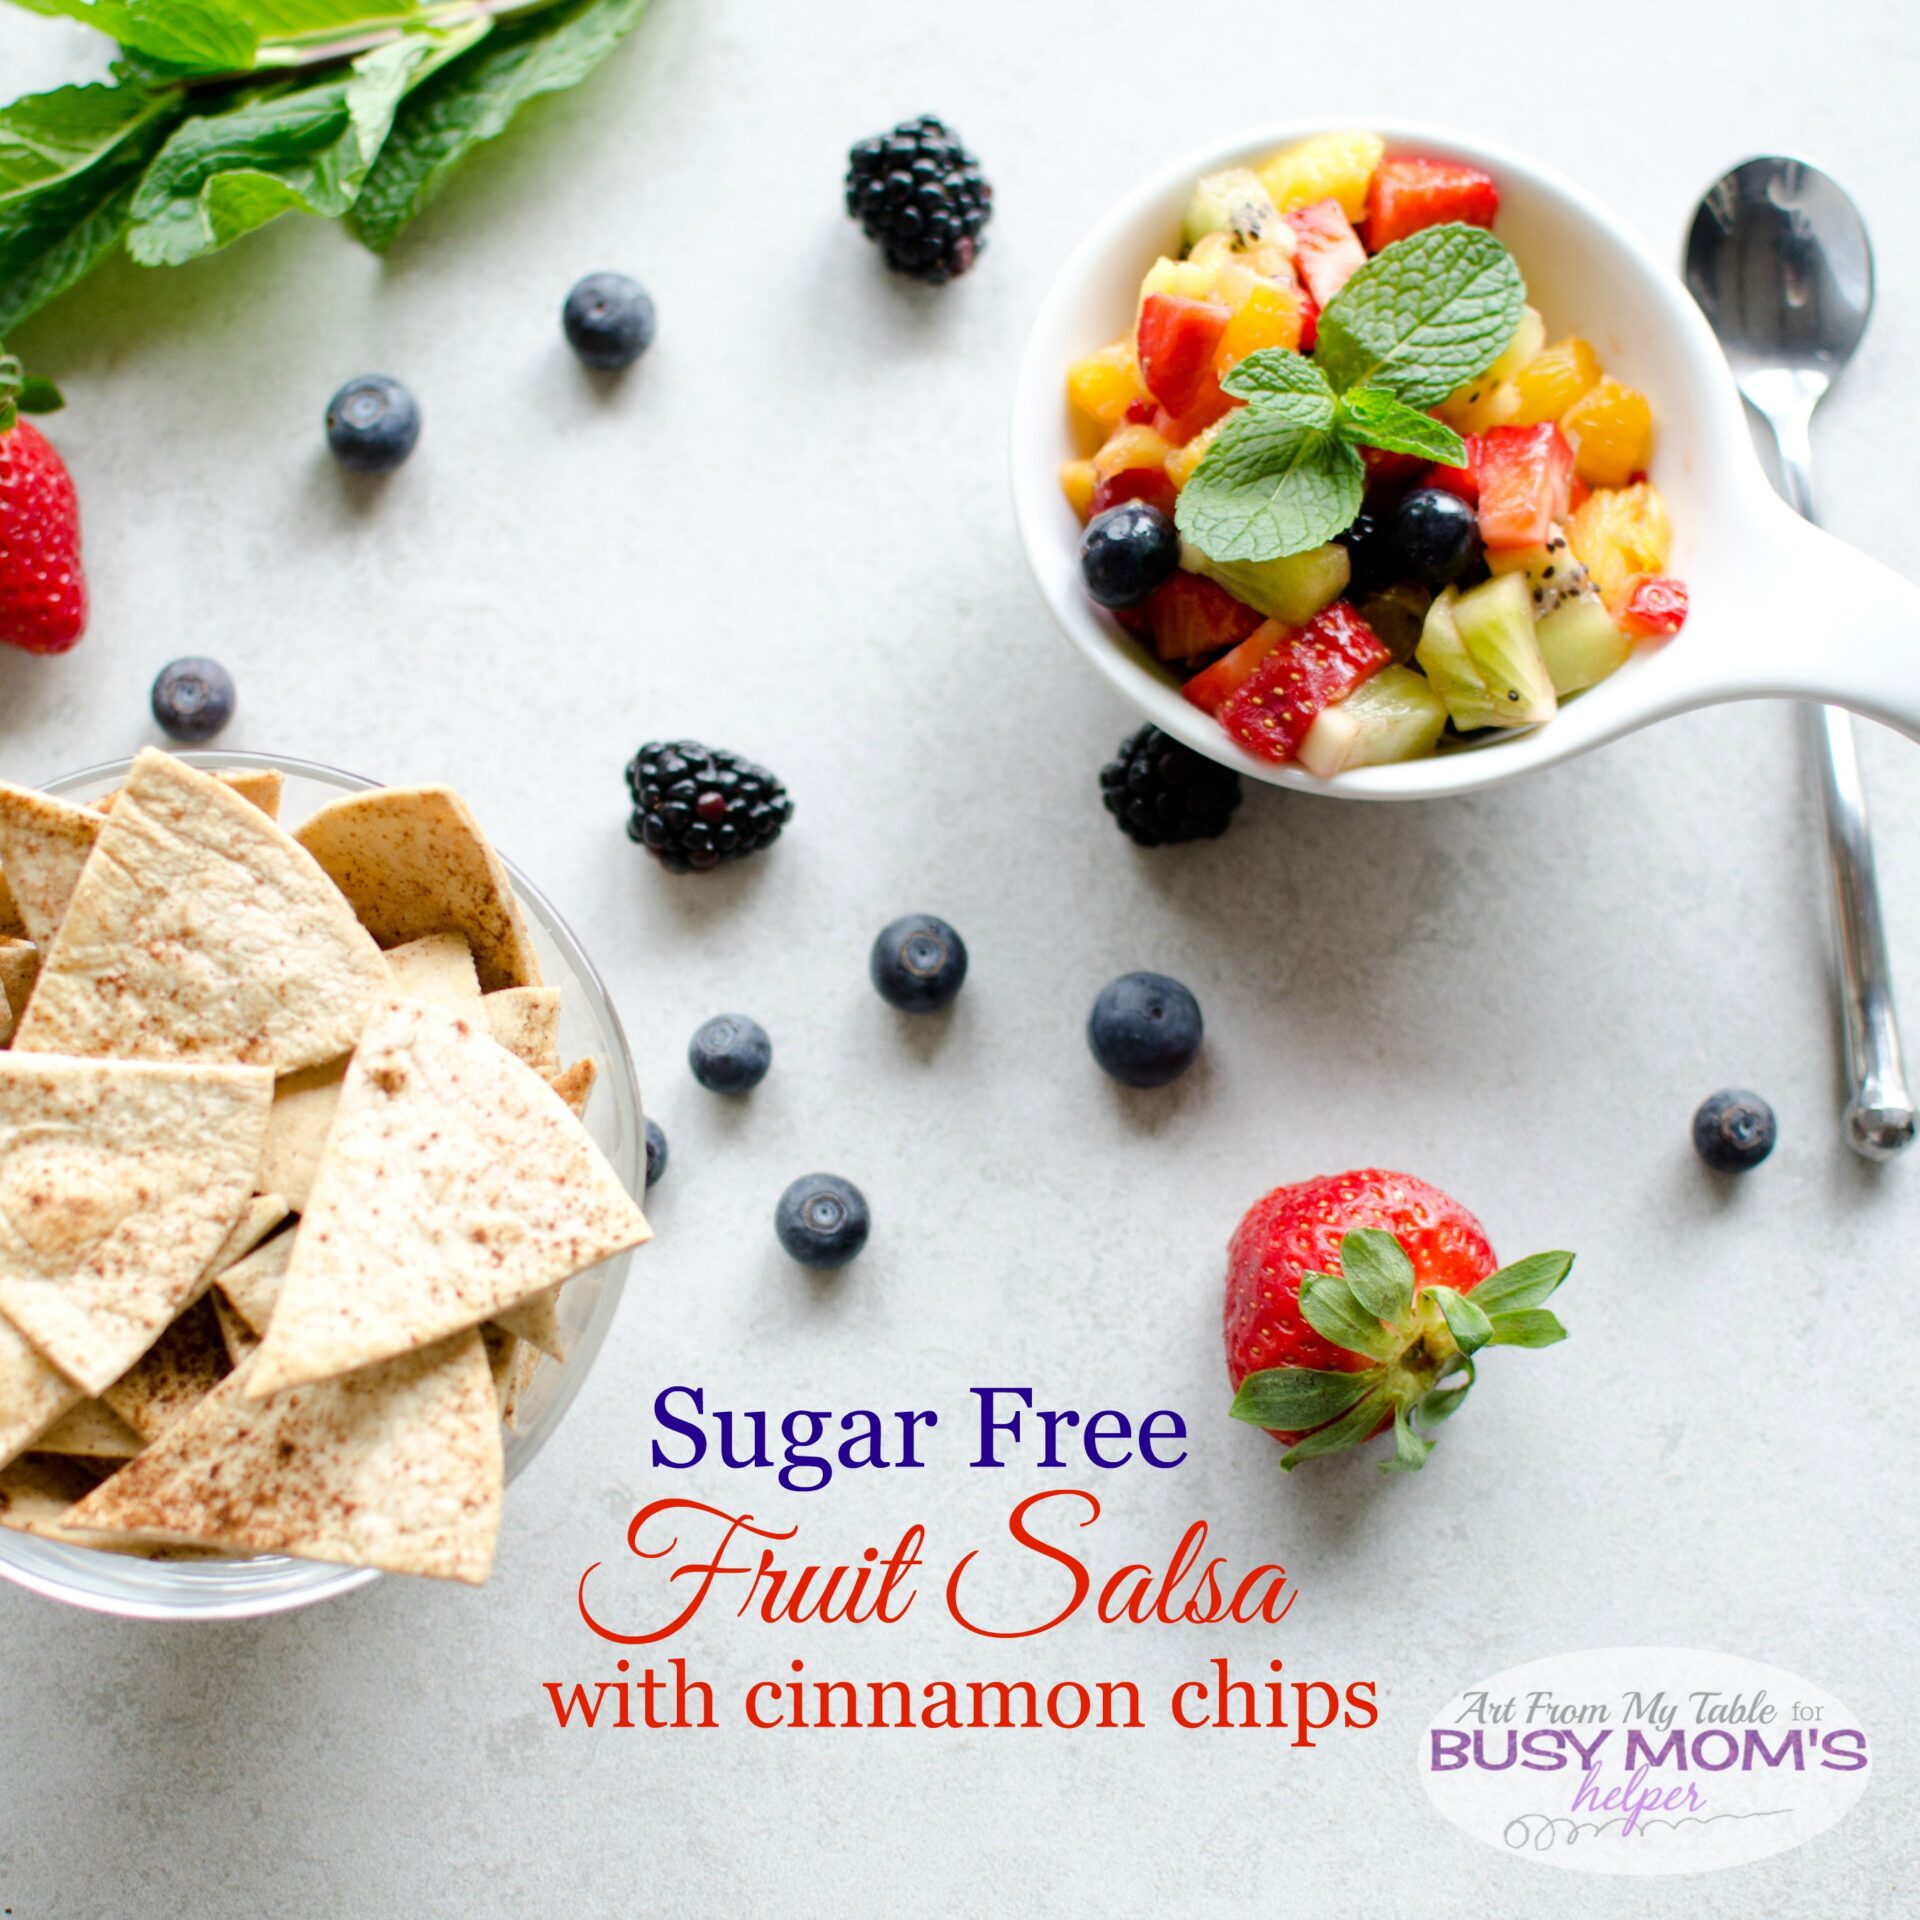
Feeling bored with the same old-same old snacks?  Try this refreshing sugar free fruit salsa!  You won’t be disappointed!

I don’t know about you, but
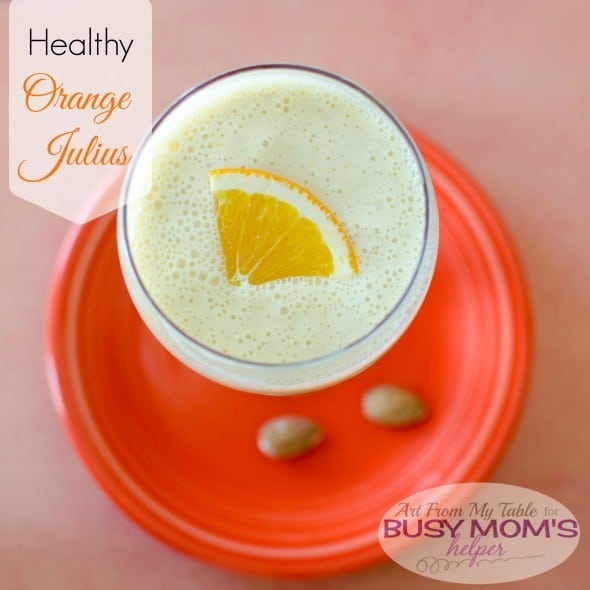
 I try to limit my kids sugar in-take.  But often times, they want something sweet.  Oh, who am I kidding?  I do too! The sugar makes the kids a little crazy sometimes, and it makes my pants too tight. So this is a perfect sweet treat with no sugar.  Fruit, it’s good for you!  The kids won’t even know ya left the sugar out.  🙂  Try this sugar free fruit salsa for your next afternoon or after school snack.

Sugar Free Fruit Salsa with Cinnamon Chips

This comes together in just three easy steps.

1.  Bake the cinnamon chips.

Take flour tortillas and brush them with melted butter and sprinkle them with a little cinnamon.

sugar free fruit salsa with cinnamon chips

Bake them at 350 for about 12 minutes until they are golden and crisp.

sugar free fruit salsa cinnamon chips

2.  Slice & Dice

Next you’ll chop up the fruit, and put some lemon juice on it.  I like the brightness the lemon adds.  I used strawberries, kiwi, oranges, mango, blackberries and blueberries. Fruit salsa is really versatile, so use whatever fruit you like.  Personally, I think this is fantastic combination.  The citrus adds a little something extra.  Yum!

sugar free fruit salsa cinnamon chipsThat fruit looks so juicy and delicious!  I just want to lick the screen!  Okay, bad idea.

3. Enjoy!

Lastly, just put it all together and serve it up.  I like to garnish it with some chopped fresh mint leaves.  It’s pretty and it tastes fabulous. sugar free fruit salsa cinnamon chips

This isn’t going to last long friends.

Most fruit salsas do contain sugar.  It definitely sweetens it up a bit, but personally, I think this fruit is sweet enough just how it it.  If we put sugar in our fruit all the time, we’ll start to not like it without.  So do something good for your body!  🙂

You’ll also notice that there is no sugar in the Cinnamon tortilla chips.  Again, you can do a blend of cinnamon and sugar, but that blend is usually made with two parts sugar and one part cinnamon (that’s a lot of sugar!) so again, in efforts to scale back on the sugar, I left it out.  I think the butter and cinnamon is delicious, and the naturally sweet fruit blends it all perfectly.  Have I convinced you to try this yet?

sugar free fruit salsa with cinnamon chips
Print Recipe

Sugar Free Fruit Salsa with Cinnamon Chips

Ingredients

  • 4 flour tortillas
  • 2 Tbs butter melted
  • ground cinnamon
  • 1 pint strawberries hulled and diced
  • 1 orange peeled and diced
  • 1 mango peeled and diced
  • 2 kiwis peeled and diced
  • 1 6 oz container black berries quartered
  • 1 6 oz container blueberries
  • Juice of 1/2 lemon
  • fresh mint leaves for garnish

Instructions

  • Preheat the oven to 350.
  • Brush both sides of the tortillas with the melted butter.
  • Sprinkle both sides of the tortillas with ground cinnamon.
  • Using a pizza cutter, slice the tortillas into eighths.
  • Place the 'chips' on a baking sheet and bake for 12 minutes, or until golden and crisp.
  • Peel, slice and dice all of the fruit and place in a bowl.
  • Add the juice of half of a lemon and stir to combine.
  • Garnish with torn fresh mint leaves (optional)

Looking for more fun low-sugar snacks?

healthy_banana_split-3breakfastpin

Breakfast banana split

mango_yogurt_parfait-7

Mango Parfait

breakfast_cookies-6870

Breakfast Cookies

sugar free fruit salsa

Filed Under: Appetizer, Dessert, Side Dish, Snack Tagged With: cinnamon, easy, Fruit, fruit salsa, guilt free, Healthy, sugar free, sweet treat

Shamrock Shake

June 25, 2018 by Chellie Schmitz

shamrock shake

Celebrate St. Patricks Day with a delicious Shamrock Shake! 

shamrock shake

Shamrock Shake

It’s that time of year again.  Time for green food, green beer (for some) and green shakes!  I read somewhere that the McDonalds Shamrock Shake has 57 ingredients!  What?!  It’s a shake, that seems like a lot! (that seems like a lot for any recipe) Don’t get me wrong, I love McDonalds just as much as the next person.  I’m not really a fan of any fast food, but occasionally, it happens.  Sometimes convenience wins.  And nothing against their Shamrock Shake, it tastes great.  But this one only has a few ingredients, and personally, I always vote for home made.

shamrock shake

We’re not Irish,  however, we are a family that loves to celebrate!  St. Patricks day is the perfect excuse for a vanilla-y, minty, chocalate-y treat!  YUM!  Plus, bonus… It’s so easy to make!!  Just five ingredients if you count the garnish, the shake itself just three.  Oh I love easy!

Since my kids were quite young, we’ve made it a tradition to have a shamrock shake on St. Patricks day.  They always look forward to it.  I’m a believer in ‘everything in moderation’, so while this isn’t healthy, per se, it is a treat that is simple, easy and festive.

shamrock shakeOne thing I like to do when we are having treats, is make sure we make up the healthy in another area. So we’ll make sure we have plenty of nutrition in our dinner or lunch that day.  Shepherd’s Pie is one of our favorite Irish-type meals.  I love it because it’s all-inclusive.  You got your meat and veggies and starch all in one dish.  And, you can make it ahead of time and cook it when you’re ready.  Serve it with some fruit and dinner. is. done.

And don’t think this recipe is just for the kids… grown ups will love it too!

shamrock shake
Print Recipe

Shamrock Shake

Ingredients

  • 2 cups vanilla ice cream
  • 1/2 tsp mint extract
  • 4-5 drops green food coloring
  • whipped cream optional
  • chocolate sauce optional

Instructions

  • Place all ingredients into a blender.
  • Blend until smooth.
  • Pour into glasses and top with whipped cream and chocolate sauce if desired.

Do you have any St. Patricks Day traditions?  What are your favorite Irish meals?

If dessert in a cup speaks your language, check out these too!

mocha_nut_steamerpin-4
Mocha Nut Steamer

peppermint_mocha_steamerpin2-7

Peppermint Mocha Steamer

Filed Under: Dessert, Drinks, Holiday Food Tagged With: celebrate, Chocolate, delicious, easy recipe, holiday food, Mint, quick and easy, shamrock shake, St. Patricks day, vanilla ice cream

Presidents Day Dessert

August 29, 2018 by Chellie Schmitz

presidents day dessert

This Presidents Day Dessert is easy, healthy, and scrumptious!

presidents day dessert

Presidents Day Dessert

Celebrate Presidents day with an easy and healthy dessert!  What?!  Celebrate Presidents day?  Who does that?  Well, the government does for one.  Often, government employees are off, and if you’re kids are as excited about getting the mail as mine, they’ll tell you there’s no mail that day.   Technically, it is a National holiday.  Many schools are closed that day.

3 Reasons to celebrate

But why celebrate?    Whether your kids are home with you, or in school during the day, life is filled with teachable moments.  As far as schooling goes, we homeschool, AND we public school.  I never thought I’d be doing both, but that’s another topic.  When we wrestled with what was best for each child, my heart didn’t want to send them away all day.  But, what I realized is just because they’re not with me all day doesn’t mean I’m not involved in their lives.  So we make the most of each moment we have.  And we love learning!  So why not learn about Presidents day?

presidents day dessert

When my kids were younger, and I was trying to make it through Michigan winters (cold, gray, dreary, mundane, did I mention cold?), I would look for opportunities to celebrate, which would make those dreary days more exciting.  For example, we celebrated ground hogs day for a couple of years.  My now older children, still ask me “what are we doing for groundhogs day?”

Lastly, it’s an excuse to eat dessert!!  Haha!  But you can feel good about this presidents day dessert, because it’s good for you.  Greek yogurt, anti-oxidant berries, and no sugar added makes this the perfect treat.  So let’s recap:

Celebrate Presidents Day because~

  • It’s a teachable moment
  • It makes an ordinary day extraordinary
  • It’s a good excuse for dessert

presidents day dessert

Not sure what to say about Presidents Day?  Here’s some resources made for kids:

  • A brief  overview on how it started
  • A little more in depth history
  • Activity pages
  • Crafts
  • Coloring pages and crafts

Parfaits are super easy to make! All you do is choose your ingredients and layer them in a jar or dish of your choice. In the recipe I’ve put approximate measurements to make 1 parfait.  You really just want to layer the yogurt and the fruit, so when you’re making this, just do what looks best to you.  It could vary depending on the size jar or dish you are using.   In our family, the kids love getting their own jar to eat out of.  I don’t know why, but they think that is awesome.  You can make these up ahead of time and store them in the fridge.  This would also make a great breakfast or snack!

presidents day dessert


Happy Presidents Day!  Go make today extraordinary!

presidents day dessert
Print Recipe

Presidents Day Dessert

Ingredients

  • 1 6 oz container coconut yogurt
  • 2 Tbs fresh blueberries plus more for garnish
  • 1 Tbs fresh raspberries plus more for garnish
  • 1 tsp unsweetened shredded coconut

Instructions

  • Start with a layer (about a tablespoon or 2) of yogurt on the bottom of a mason jar or other serving container.
  • Place 1 Tbs blueberries on top.
  • Layer more yogurt.
  • Place 1 Tbs raspberries.
  • Layer more yogurt.
  • Place 1 tbs blueberries on top.
  • Finish with a dollop of yogurt, fresh berries and a sprinkle of coconut.
  • Serve immediately, or store in the refrigerator until ready to eat.

Looking for more easy recipes?  Try these:

Mango Parfaits
mango_yogurt_parfait-7

Breakfast Banana Split
healthy_banana_split-3breakfastpin

Triple Berry Smoothie
triple_berry_spinach_smoothiepin-2

Filed Under: Breakfast, Dessert, Holiday Food, Snack Tagged With: Blueberries, Breakfast, celebrate, dessert, fresh berries, Healthy, no sugar added, parfait, presidents day, raspberries, real food, Snack, yogurt

Thriving Through The Dinner Dilemma

January 26, 2016 by Chellie Schmitz

dinner dilemma

dinner dilemma

The Daily Dinner Dilemma

It’s 4 o’clock, or maybe even 5, and you have no idea what’s for dinner.  The children are restless, they’re tired, and they’re arguing.  You’re breaking up fights and you have to figure out what to feed these people.  Have you been there?  Or is it just me?  Today I’d like to share with you  five tips on how to not only survive, but thrive through the daily dinner dilemma.

There’s really two challenges to over come here.  The first is figuring out what’s for dinner, and getting it on the table, and the second is how to manage the chaos happening around you.  I don’t understand what happens around four o’clock, but as mentioned above, I feel like the kids are in this restless state, and they’re tired, and it just comes out in negative ways.  Whether your children are toddlers or school age kids, I’ve found this to be true.  These tips will help you with both challenges.  Are you ready to face the dinner dilemma head on?

Tip #1

Meal plan.

thriving dinner dilemma

This really is the main key to the dinner dilemma. It’s the most important tip I have today, and I know you’ve heard it before.  You know this, it’s just a matter of actually doing it.  A long time ago, when I was in the corporate world, we use to have this saying, “if you fail to plan, then you plan to fail”. I think it holds true here too. It takes discipline.  I have to schedule it to make it happen.  But it’s so worth it!!  Even just knowing what’s for dinner at the beginning of the day takes a huge weight off my shoulders.  It’s kind of like exercise, I know tons of people that don’t really enjoy exercise, but I’ve never heard anyone say they regret doing it.  Really, have you ever heard someone say “I really wish I wouldn’t have worked out today.”  No!  Of course not, and it’s the same with meal planning.  You won’t regret it because although it takes a little time, it will make your life so much easier.  Here’s a free printable for a weekly meal plan, and here is the planner I use.

Tip #2

Start dinner early.

dinner dilemma

A little meal prep will go a long way.  If you can chop veggies or thaw meat early in the day, do it.  Then when it comes to putting dinner together, much of the work will be done and it will come together quicker.  If you’re having a casserole or lasagna or something like that, assemble it in the morning so all you have to do is put it in the oven.  Plus, you’ll feel like you’ve accomplished so much early on!

Tip #3

Play relaxing music.

We’ve moved into managing the chaos.  Having soothing music on in the background will help create a calming atmosphere, for you AND the kids.

Tip #4

Light a candle, or diffuse some essential oils.

dinner dilemma

I’m a big fan of essential oils.  There are so many different kinds and they have awesome benefits.  You can actually diffuse something that will help calm people, or uplift them, etc.  Lavender is probably my favorite scent and it’s known for calming and relaxing.

Tip #5

Plan an activity for the kids.

dinner dilemma

I like to pick something that isn’t too messy, and something they don’t get to have access to anytime.  You might think about having a little bin full of a few activities that the kids only get to play during this time.  If it’s “special” it’s more apt to keep them occupied during that time.  The dollar store has these cute paint with water books where the paints are right on the page.  My kids will often sit at the counter while I’m cooking and paint a picture.  Oil pastels are another art medium that isn’t messy, yet it’s different than crayons or markers.  Word searches or crossword puzzles are fun, and you can find those free online.  Sticker books, or a special coloring book that only comes out at this time.  Make words with scrabble tiles ( great way to practice spelling words).  Write a gratitude list.  A toddler can play blocks or play with your tupperware at your feet. Or, quiet time.  Sometimes we all need a little quiet.  So, why not give them a bedroom time/quiet time activity that they can do on their own in their rooms.  Down time is good. They can look at books, or do a puzzle.  They may not want to, but it may be what you both need.  Have a different activity for each day of the week to make it more interesting.

Easy Dinner Ideas

Good bye dinner dilemma! Here’s some ideas to get you started on your planning.

  • Tacos~ who doesn’t love tacos?  Make a double batch of meat and put half in the freezer so you’re ready for the next week.  Mexican is fantastic because the same ingredients create many different recipes.
  • pasta night~use a whole grain pasta for added healthy benefits. You can change up the sauces each week and it feels like a new meal, yet it’s still pasta
  • Sandwich night~How about a hot sandwich for something easy but different.  Ham and cheese baked in the oven.  Melt some butter, mix it with chopped onions, mustard and a little honey, pour that over the top of the ham sandwiches, cover and bake. (Mouthwatering, isn’t it?)
  • Pizza Buffet~Top your own french bread pizza.  Just have some french bread and toppings ready and let your kids choose.  My kids love the buffet style dinner.  You can do it with tacos, salads, rice or noodle bowl.
  • Soup, salad, baked potato night.  A filling meal that comes together quickly.
  • Breakfast for dinner~pancakes, eggs, bacon and toast.
  • Meat and Cheese plate~Put assorted deli meats and cheeses out on a plate.  Add bread, or crackers, fruit (dried or fresh), nuts and veggies.
  • Traditions~have a couple nights of the week that is always the same thing.  For example, we always do pizza on Friday nights.  Sometimes I make it, sometimes we order it.  Sunday nights, we always have popcorn and apples for dinner (well, the kids do, mom and dad do take out after the kids go to bed EARLY.  This is our “in-date” night)

How do you thrive through the dinner dilemma?  Do you have any tips to add?

Need some recipes?

Turkey_sweet_potato_skilletpin-3

carnitas_verde_casserolepin-12
tostadapin-1

Head over HERE for a free cookbook!

dinnerdilemmapin


Filed Under: Main Dish, Organization & Cleaning, Time Management Tagged With: dinner dilemma, dinner ideas, meal planning, meal planning tips, what's for dinner

Healthy Orange Julius

June 25, 2018 by Chellie Schmitz

healthy orange julius

Healthy Orange Julius

healthy orange julius

I have a thing for smoothies.  Me and smoothies go together like, Laverne & Shirley.  I think I’m dating myself here, anyone remember Laverne & Shirley?  I love making smoothies with fresh berries in the summer, fresh apples in the fall, and this time of year?  Citrus.  This Healthy Orange Julius will knock your socks off!  Get you dancing!

A long long time ago, way back before I was married or had kids, I was a hairdresser.  And I had this one client that always brought me an Orange Julius.  If you’ve never had one or you don’t know what I’m talking about, just make this smoothie and you’ll be caught up.  I never really frequented the place where you can buy them.  As a matter of fact, this client was the one that introduced me to them.  And she was a faithful client.  She was in every four weeks for a cut and color.  So every four weeks, I got to enjoy an Orange Julius with her.  She was a sweetie.

healthy orange smoothie

One of the things that I love about Smoothies is it doesn’t take much to be fantastic.  Just a few simple ingredients and Ta-da!  You have scrumptiousness.

So for my Healthy Orange Julius, you’ll need oranges, orange zest, a banana, vanilla greek yogurt and some almonds.  You’ve got it all here folks, protein, vitamin C blah blah blah.

healthy orange julius

Toss it all in the blender and you’re good to go!

Helpful Hints

  • If you like a thinner smoothie, add some milk.
  • Dairy Free?  Use a soy yogurt, or other substitute
  • I always add ice, about 5 or 6 cubes, to keep it nice and cold.  The blender motor can warm it a bit.
  • If you’re using frozen bananas (or other fruit), there’s no need for the ice.


healthy orange julius

healthy orange julius
Print Recipe

Healthy Orange Julius

Ingredients

  • 3/4 cup Vanilla Greek Yogurt
  • Zest from 1 orange
  • 2 oranges peeled and separated
  • 1 banana in large pieces
  • 2 Tbs whole almonds
  • 5-6 ice cubes

Instructions

  • Place all ingredients in the blender.
  • Blend on high until smooth.

Looking for more healthy recipes?

Tropical Green Smoothie

Fig Smoothie

Guilt-Free Gingersnap Steamer

healthy orange julius

Filed Under: Breakfast, Dessert, Drinks, Health & Fitness, Snack Tagged With: all natural, almond, Breakfast, creamy, good for you, Healthy, orange, real food, Smoothie, Snack

The Most Helpful Printables EVER for busy families! Nab just a mini set of your favorites, or get the whole pack! Practically every printable a busy family could use - over 70 pages PLUS two BONUS items! Help get organized with categories like: Money, Scheduling/Time Management, Kitchen/Meal Planning, Security & Home Management, as well as Trip Planning! #printables #busymom #busyparents #busyfamily #busyfamilies #printableset #parenting #moms #money #homemanagement #timemanagement
Unofficial Disneyland Activity Book / by Busy Mom's Helper
52 Weeks of Meal Plans on a Budget with Recipes
  • Disclosure/Privacy Policy
  • User Data Protection

© 2021 · busymomshelper.com