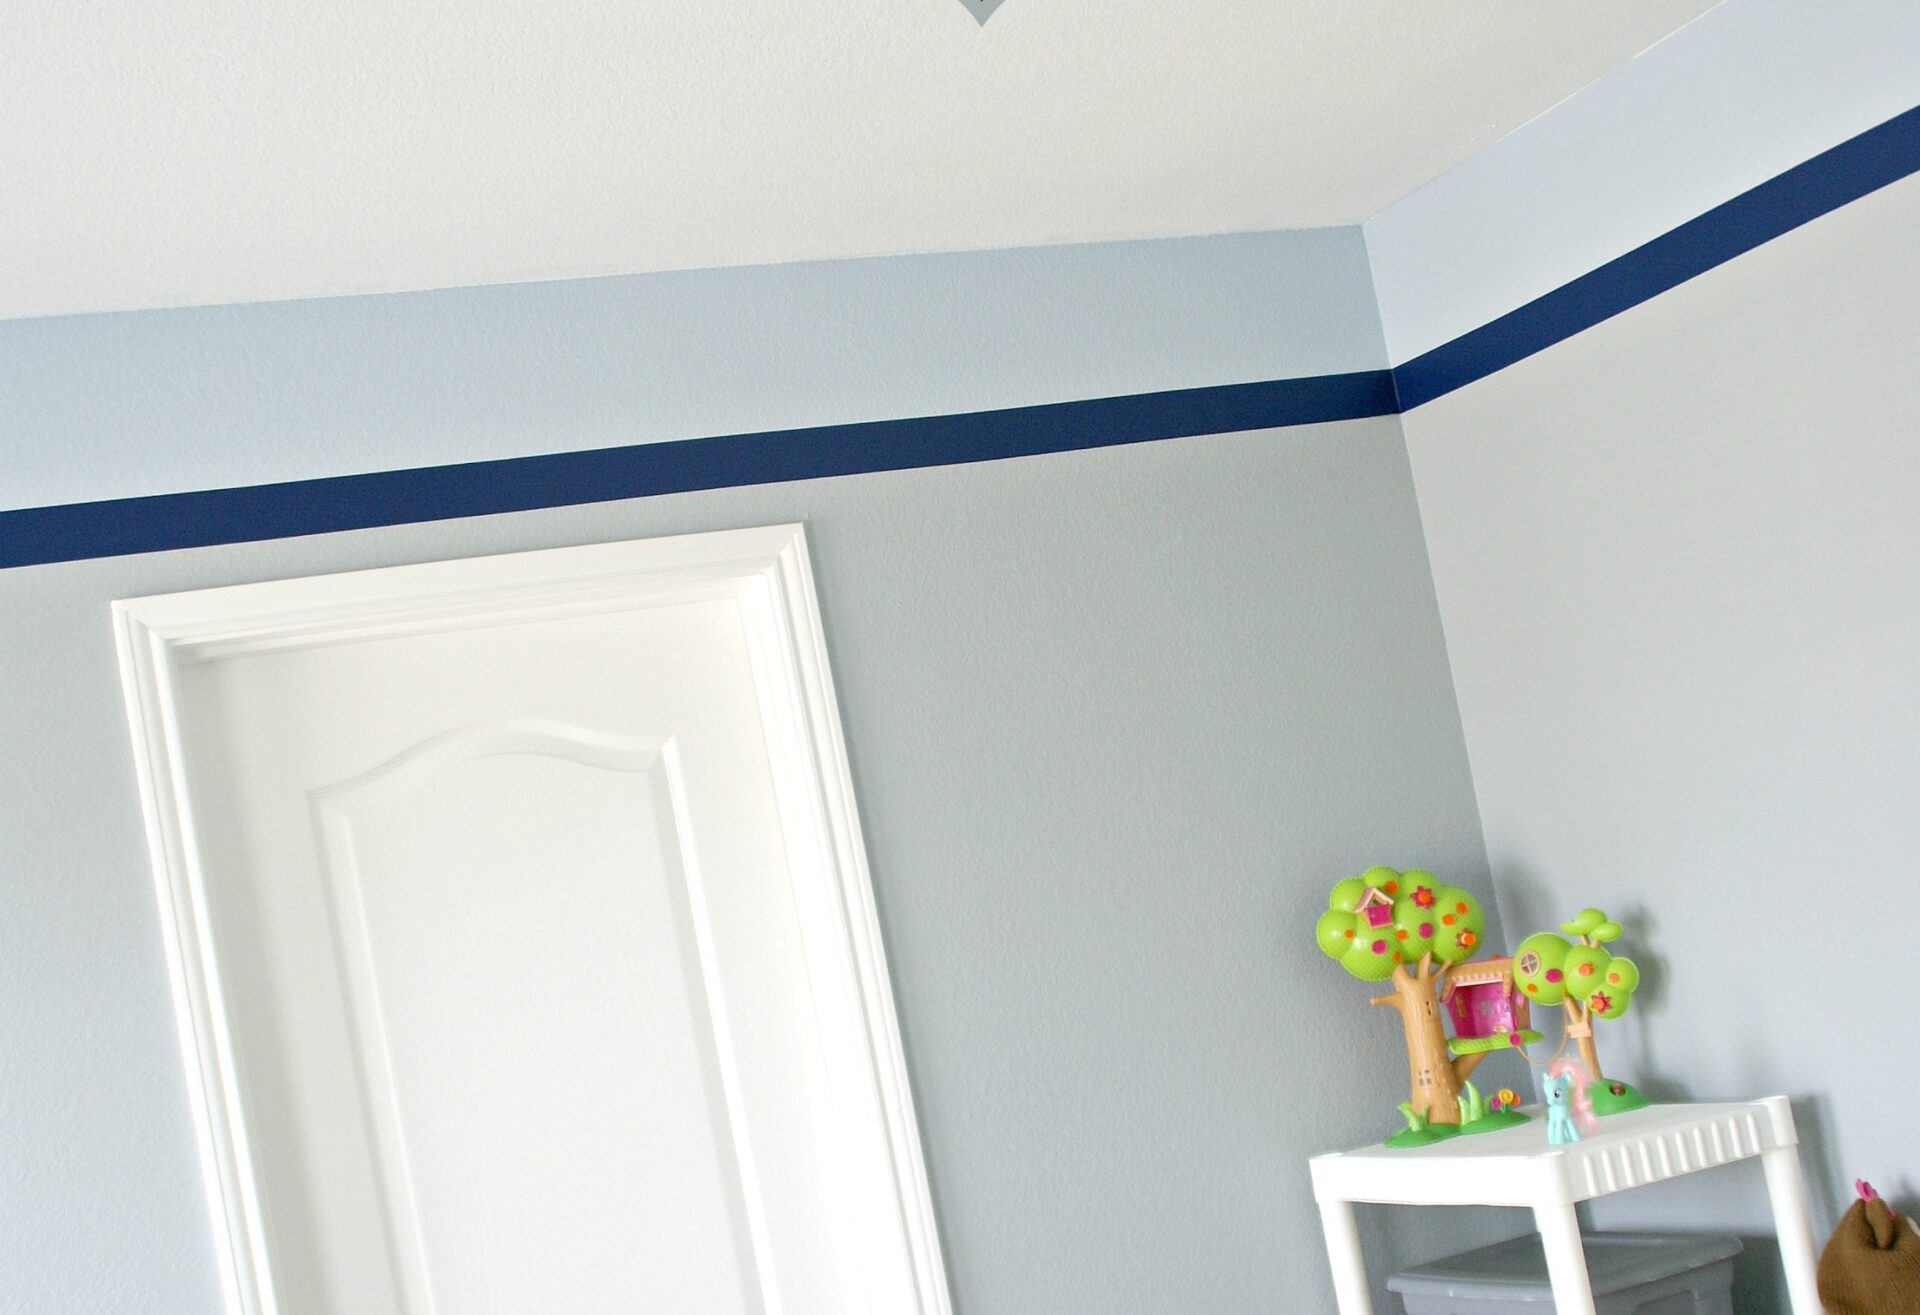
So we’re remodeling Wonder Woman’s room. By remodel, I mean MAJOR OVERHAUL! Our house is completely new, so it isn’t a matter of yuck, just
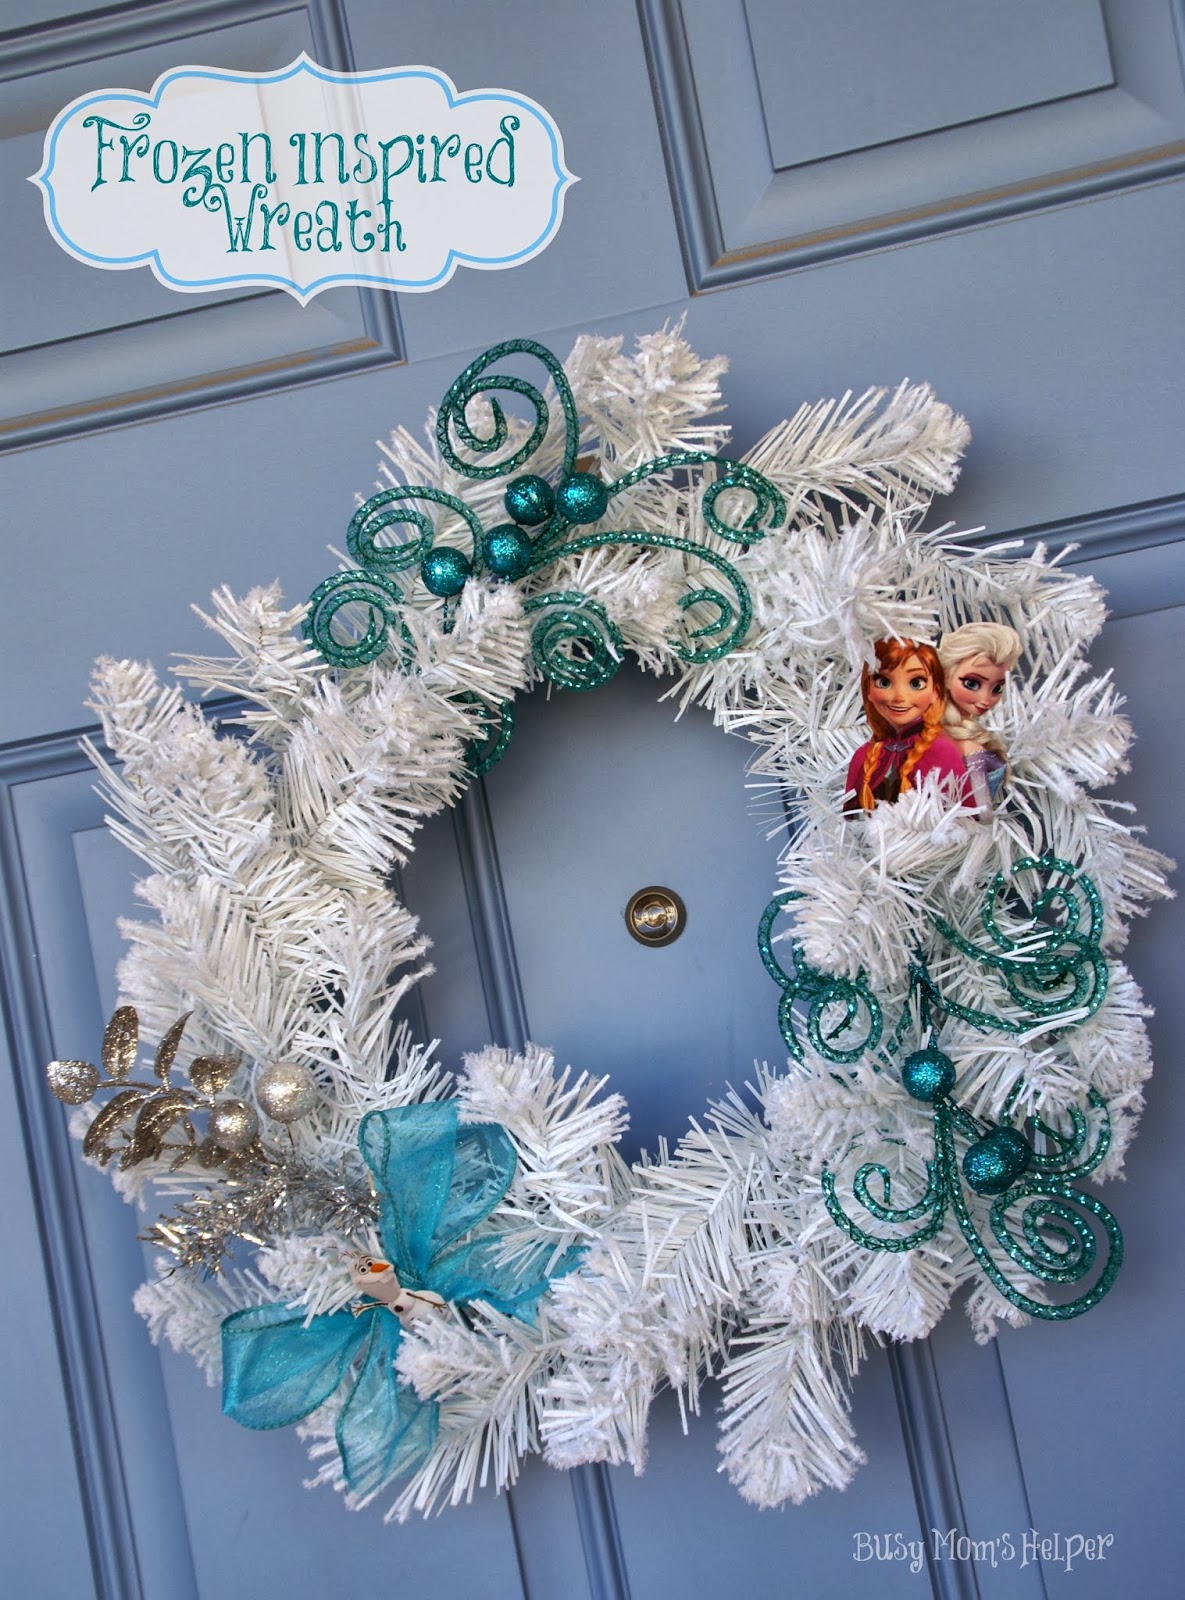
Have you seen the movie Frozen, yet? We went on my birthday, and it was FABULOUS! Seriously, such a cute story, unique, and the music
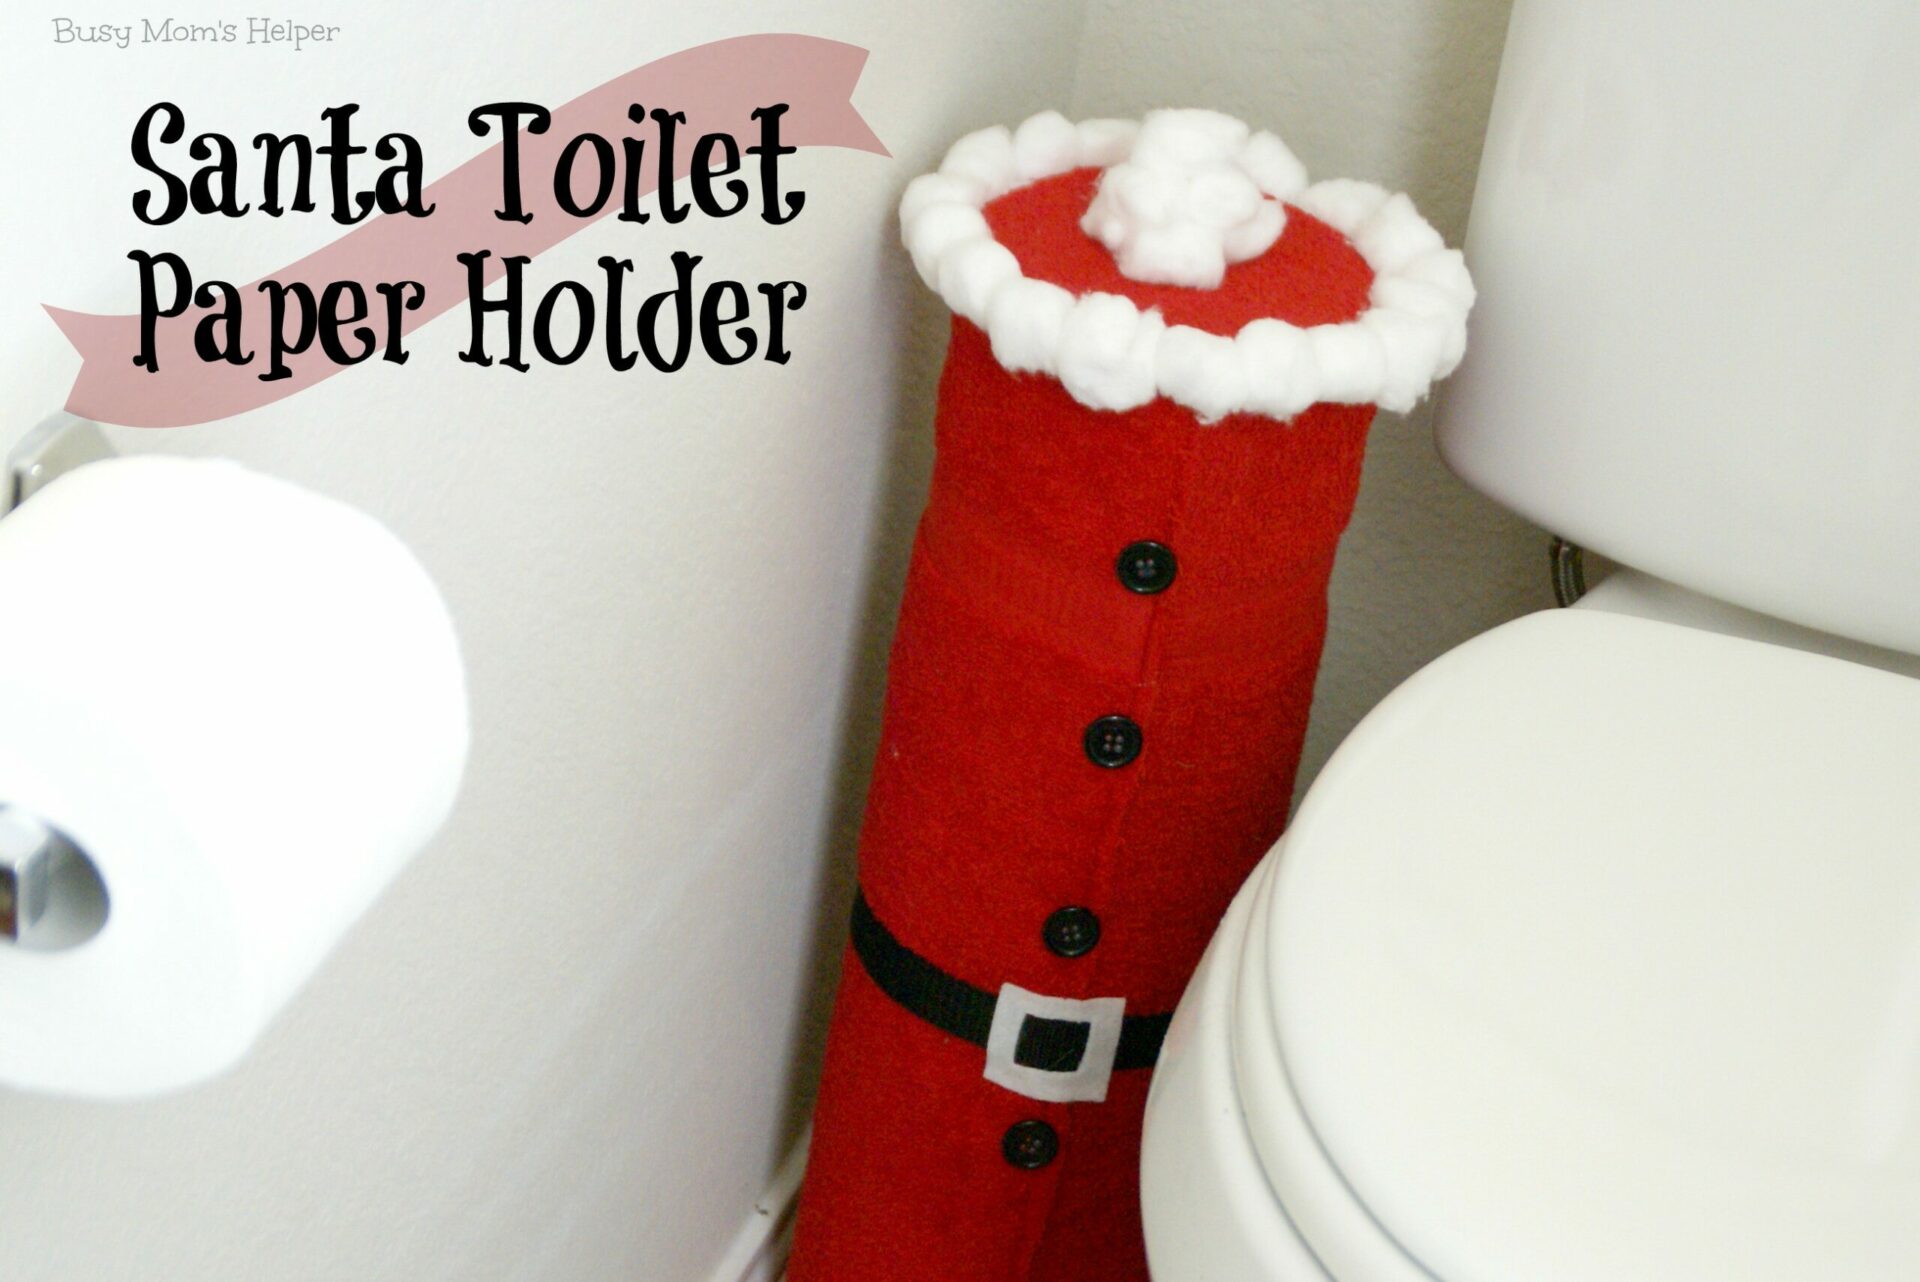
Ya, I totally just put Santa in the corner, holding my toilet paper. Why? Well, because SOMETHING has to hold the toilet paper for those
I have hardly any Fall/Thanksgiving decorations. I mean, like 3 or 4 things (that’s including my Fall Gratitude Banner). I don’t know if I just
First of all – it’s November. Seriously!!! I still can’t believe that – like I’m in shock or something. Since there’s nothing I can do
So, I don’t know if this would actually count as a post – but I feel bad I haven’t shared anything since Saturday. Reason being:
View More